Start the APOS by double clicking the shortcut icon on the desktop.
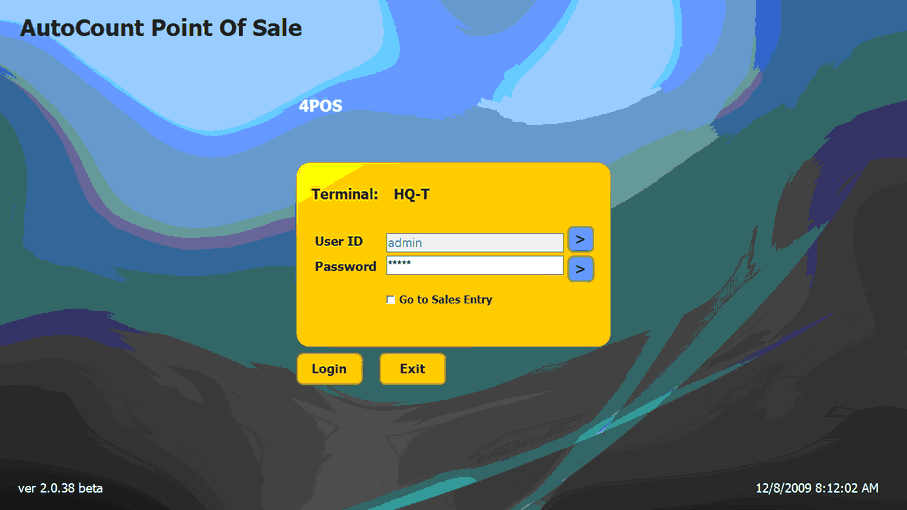
Key in a valid User ID and Password to Login. (you may also check 'Go to Sales Entry' to skip the next page.)
If you are using touch screen monitor, touch on the ![]() to call out the Keyboard screen.
to call out the Keyboard screen.
Click on Login,
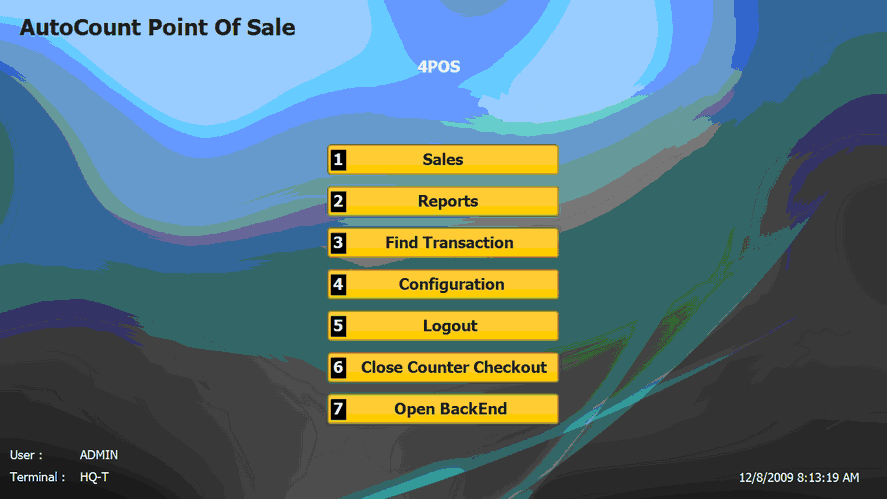
This is the main menu of APOS. We shall look into this later.
Click on Sales or press 1.
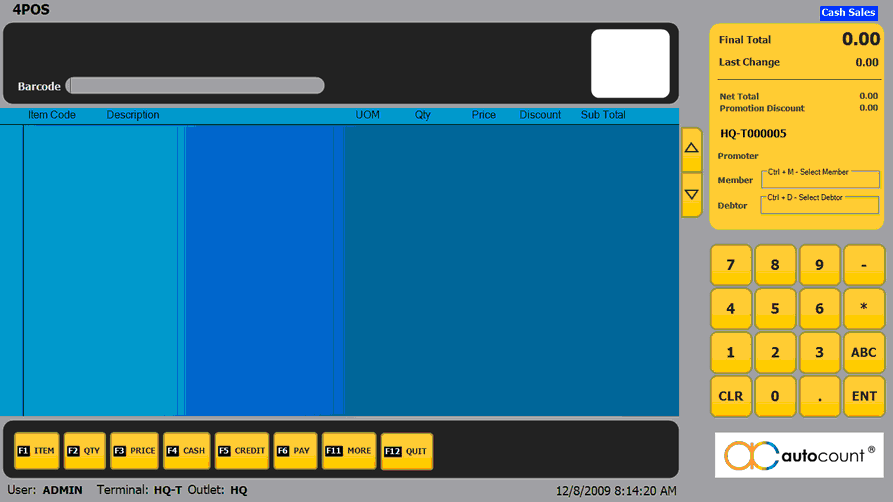
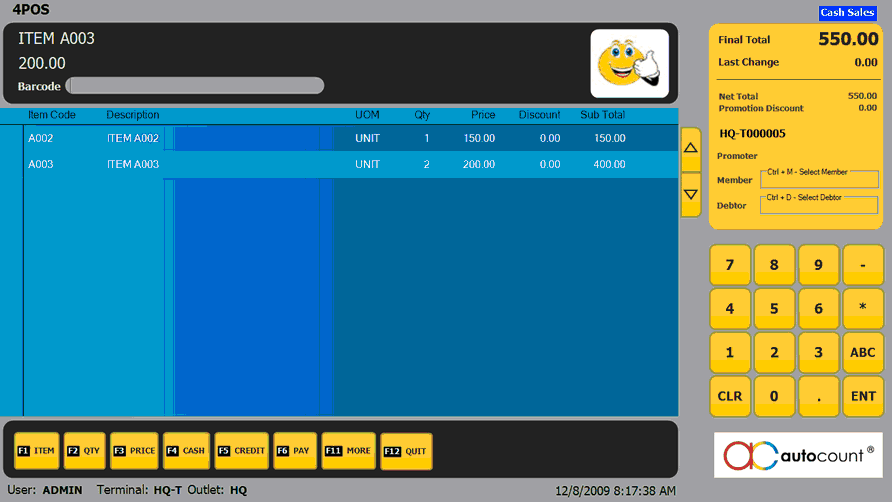
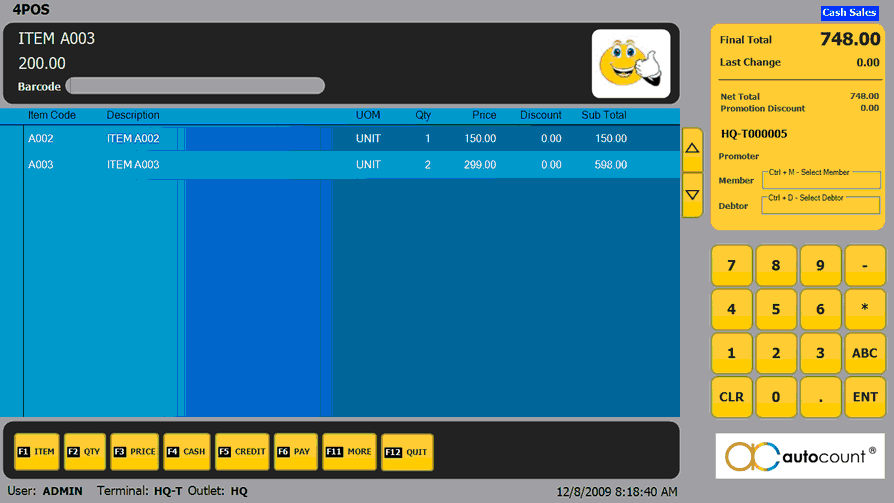
This is the main transaction screen of APOS.
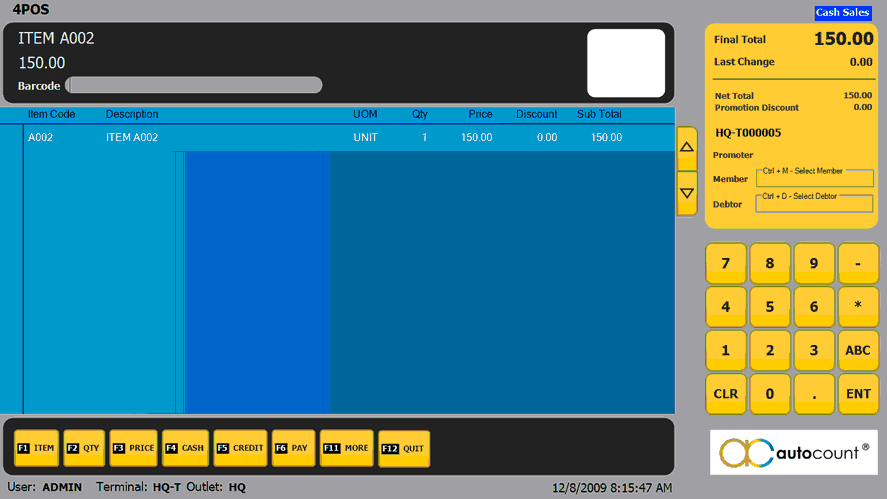
Barcode: place the cursor here and you may start scanning the item's barcode. For example, i scanned an item:
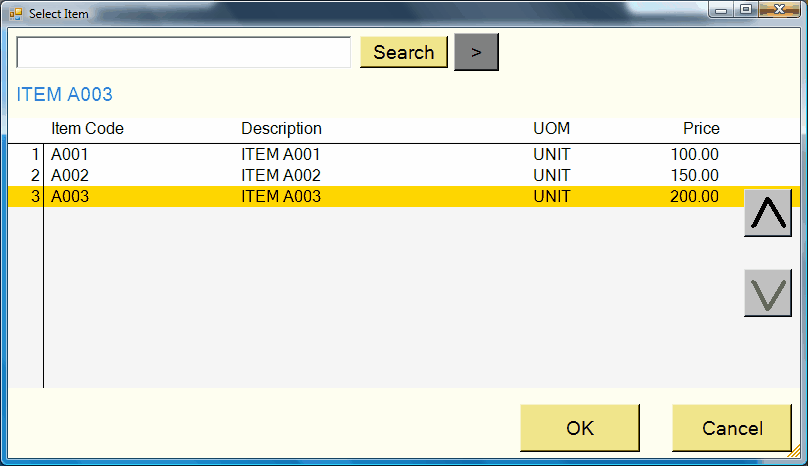
Click on ![]() or press F1 to search for item ...
or press F1 to search for item ...
Click on Search, select an item, then click on OK.

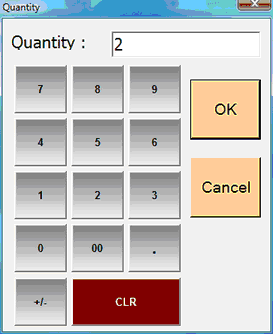
Click on ![]() or press F2 to edit the quantity of the highlighted row.
or press F2 to edit the quantity of the highlighted row.
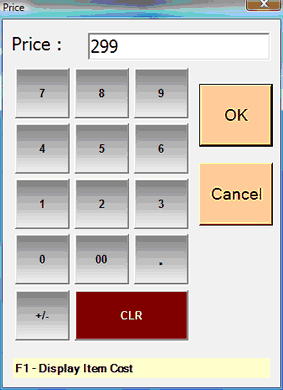
Click on ![]() or press F3 to edit the unit price of the highlighted row.
or press F3 to edit the unit price of the highlighted row.
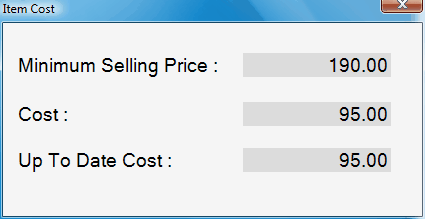
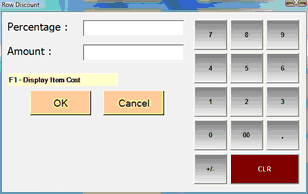
Press F1 (on price screen) will show the item cost.
Click on ![]() or press F4 to process the cash payment..
or press F4 to process the cash payment..
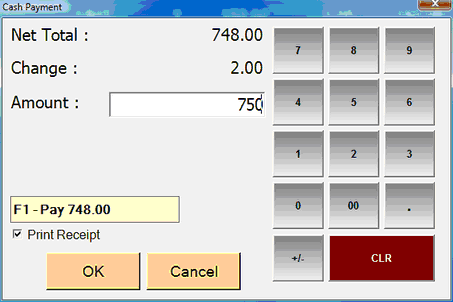
Key in the Amount received, the Change will be shown immediately.
(Press F1 will conclude the Exact Payment. )
By clicking on OK, the receipt will be printed. (Except you have opted for 'Line Printing' which the item will be printed once it was scanned.) The screen will then ready for next transaction.
Create another bill,
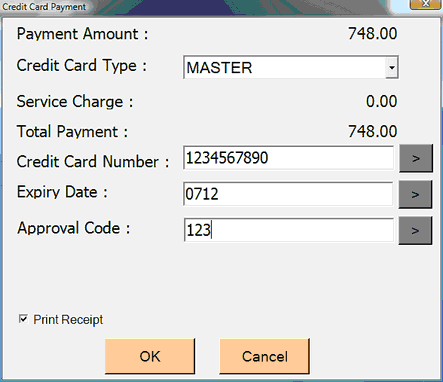
Click on ![]() or press F5 to proceed with Credit Card payment.
or press F5 to proceed with Credit Card payment.
Click on ![]() or press F6 to proceed with Multi Payment.
or press F6 to proceed with Multi Payment.
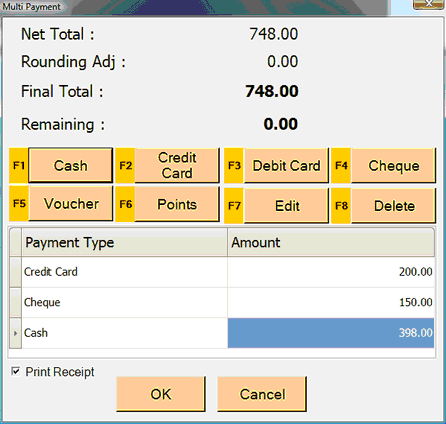
Different payment method will lead to respective G/L posting according to Location Maintenance.
Click on ![]() or press F11 to proceed with more transaction option.
or press F11 to proceed with more transaction option.
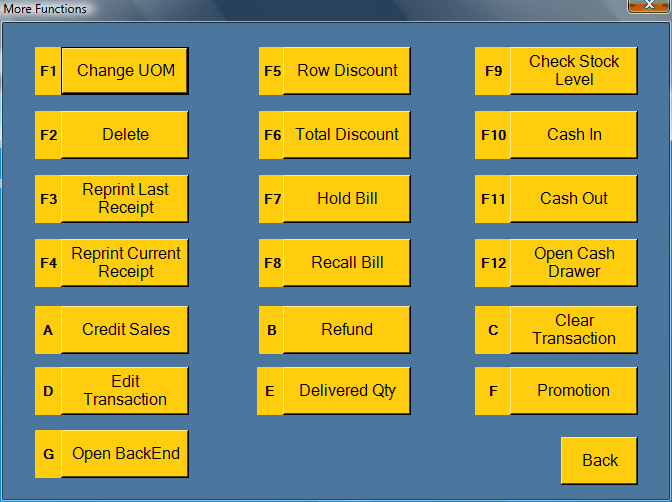
Each of the buttons is preceded with a Fast Key.
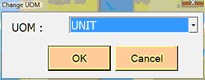
F1 Change UOM: click on this to change the current Unit of Measurement.
F2 Delete: click on this will delete the highlighted item row.
F3 Reprint Last Receipt: click on this to reprint the last saved receipt.
F4 Reprint Current Receipt: click on this to reprint the current receipt (for 'line printing' when it is out of paper).
F5 Row Discount: click on this to enter the discount in percentage or amount for the highlighted item row.
F6 Total Discount: click on this to enter the discount in percentage or amount for the whole bill.

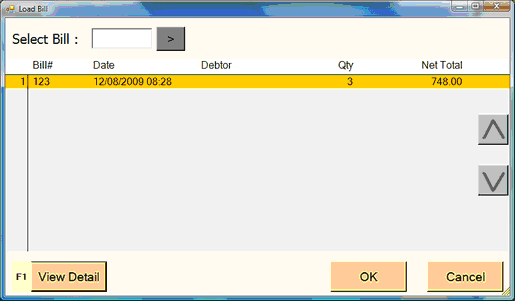
F7 Hold Bill: click on this to out the bill on hold (you will be required to key in a temporary number for this bill), and proceed with next transaction/customer.

F8 Recall Bill: click on this to recall the bill that was earlier put on hold, just select from the list and return to the bill transaction screen.
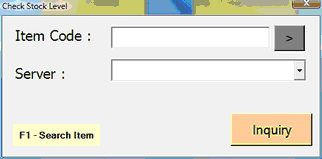
F9 Check Stock Level: click on this to check the stock level of a particular item code at an outlet/location. Before this you must have done the Sync Server List.
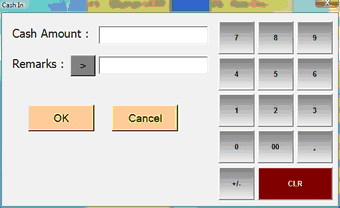
F10 Cash In: click on this to record any cash placed into the cash drawer without involving sales.
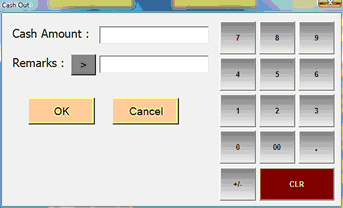
F11 Cash Out: click on this when cash is taken out from the drawer without involving transaction.
F12 Open Cash Drawer: click on this to open the cash drawer.
A Credit Sales: at transaction screen, press CTRL+D to select debtor, scan the item, click on More, select Credit Sales. This transaction will be save as credit sales.
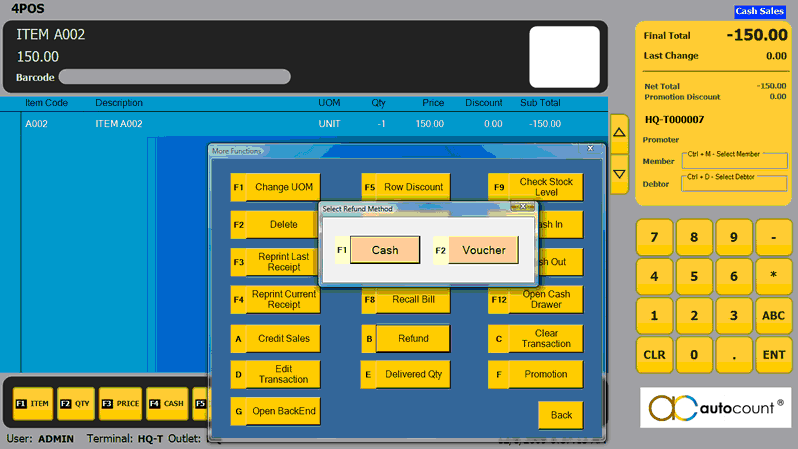
B Refund: when customer return an item, scan it, and change the quantity to negative (-1), click on More, select Refund. Then select refund method.
The returned item can be replaced with a new / another item(s), and if the final total is still negative, proceed with Refund; if the final total is positive, proceed with payment.
C Clear Transaction: click on this to clear the transaction rows, all the transaction rows will be cleared and ready for a fresh transaction.
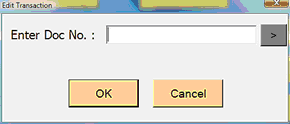
D Edit Transaction: click on this to retrieve a document (Sales Order) which involved Deposit payment or not yet been paid /delivered.
E Delivered Qty: click on this to check or edit the delivered quantity of an earlier saved Sales Order. see Deposit Transaction.
F Promotion: click on this to view the promotion details and the amount saved.
G Open BackEnd: to open the login screen of AutoCount POS BackEnd or AutoCount Accounting (depending on setting in POS Options).